
Thursday, April 06, 2017
Baby Onesie
I made this cute little Onesie today. I used my handy, dandy Cricut Explore Air 2 machine!!I am loving this machine!!
I have lots of projects in mind to make.
Here is a photo of the Onesie and my Etsy shop if you want to check it out. Not much in there YET... I will work on getting lots of my creative and crafty things in there.

Saturday, April 01, 2017
Secretary desk re-do
I bought a secretary desk from an antiques warehouse called Vintage Finders Warehouse. It is located right near me and it is a fascinating place!!! This is also the place where I buy all of my Dixie belle paint.
I got some Vintage Duck Egg and Lemonade Dixie Belle paint to re-do this desk and the chair.
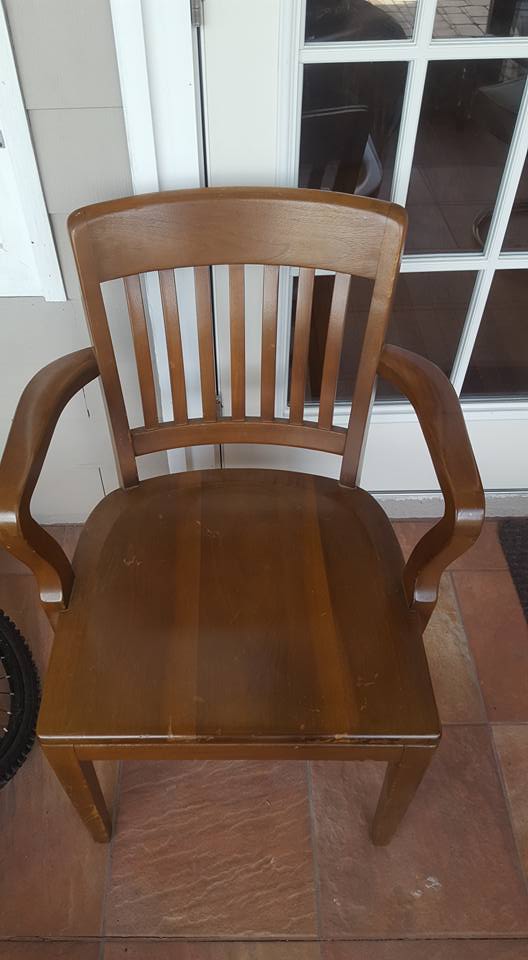
I started painting the chair first. I came across this cool brass thing embedded into the leg of the chair while painting. Here is a LINK to the history of this symbol and the company who makes the chair. Super cool to find this!!
 Here are the before photos of the desk and chair...


 This was a fun project UNTIL I got to the inside of the secretary. Oh my. If only the tiny little shelves were able to be removed....
I needed tiny little elf hands with tiny little elf paint brushes. What a pain. I got it done though. I do like the outcome. This is where my Cricut will live so I can make cook craft projects more off than I do. I love my Cricut but when I have to pack it up and store it away in my closet each and every time I use it and vice versa for unpacking and assembling everytime... I just don't take it out as much as I would love. I have lots of projects that I have created and saved the the Cricut just waiting to be made. :)
Here are the after photos of the chair and Secretary.
This was a fun project UNTIL I got to the inside of the secretary. Oh my. If only the tiny little shelves were able to be removed....
I needed tiny little elf hands with tiny little elf paint brushes. What a pain. I got it done though. I do like the outcome. This is where my Cricut will live so I can make cook craft projects more off than I do. I love my Cricut but when I have to pack it up and store it away in my closet each and every time I use it and vice versa for unpacking and assembling everytime... I just don't take it out as much as I would love. I have lots of projects that I have created and saved the the Cricut just waiting to be made. :)
Here are the after photos of the chair and Secretary.

 I love the desk and I am now off to find a piece of furniture in my kids bedrooms to paint. :)


Wednesday, March 08, 2017
Laminate topped dresser re-do
Oh wow!! Never want to do this again!! Check out this... I was told that with chalk paint, you do not have to rough up the laminate before painting. That you can paint ANYTHING. Well, not so. This is what happened when I painted the laminate without roughing it up. I tried to paint a 2nd coat and it started to take up the paint. I took a cloth to it and it all just started coming up like nothing at all.


 I did not have a problem with the drawers. Thank goodness!!
 The before photo is awful. Haha! We dumped all his stuff onto the top and I didn't feel like cleaning it off before taking the before picture.
n
I could see all the lines from the sandpaper on the top. I used an 80 grit because I didn't feel like the 320 was roughing it up enough. I should not have done that. The paint stuck to it like glue but looked terrible after. I then used a 320 grit to sand the paint smooth and then repainted with a black chalk paint. I used a Polyacrylic to seal up the whole dresser. A friend stopped by while I was still doing the Poly and it dried before I got back out to it. there were drips and splotches that dried white and not clear. I was not happy. I repainted the top with the black chalk paint again, the next morning. I then used a black Annie Sloan wax to seal the top. I was done with the Poly. It tends to foam up and if you do not get all the foamy parts to smooth out before it dries, it dries white and looks terrible.
This was a super cheap dresser that my son has had. I just wanted to make it took decent and not as ugly as ugly gets like it was. I want to buy him a nice all wood dresser to re-do and get rid of this one. This will tide him over until them. :)
The before photo is awful. Haha! We dumped all his stuff onto the top and I didn't feel like cleaning it off before taking the before picture.
n
I could see all the lines from the sandpaper on the top. I used an 80 grit because I didn't feel like the 320 was roughing it up enough. I should not have done that. The paint stuck to it like glue but looked terrible after. I then used a 320 grit to sand the paint smooth and then repainted with a black chalk paint. I used a Polyacrylic to seal up the whole dresser. A friend stopped by while I was still doing the Poly and it dried before I got back out to it. there were drips and splotches that dried white and not clear. I was not happy. I repainted the top with the black chalk paint again, the next morning. I then used a black Annie Sloan wax to seal the top. I was done with the Poly. It tends to foam up and if you do not get all the foamy parts to smooth out before it dries, it dries white and looks terrible.
This was a super cheap dresser that my son has had. I just wanted to make it took decent and not as ugly as ugly gets like it was. I want to buy him a nice all wood dresser to re-do and get rid of this one. This will tide him over until them. :)
 The blue paint is the Dixie Belle paint in Bunker Hill Blue. The black was Dixie Belle's Midnight Sky.


Friday, March 03, 2017
New Chair makeover!


Wednesday, February 08, 2017
Distressed chair results
This was my first attempt at distressing anything. I think it came out OK. Here are some pictures along with a before and after. I used Valspar clear wax and Annie Sloan black wax. I did NOT use chalk paint. I used a regular satin wall pain by Glidden in Pewter. This could be why the wax did not seem to stick to the paint the way I had seen it done. I will definitely use a chalk paint on my next project.


Tuesday, February 07, 2017


Subscribe to:
Posts (Atom)